A kind internet user has emailed me both the parts catalog and repair manual/sevice instructions for the Mamiya RB67 ProS, I previously scoured the internet for these but could not find either.
So I am making them available here for all film users, enjoy.
Service Instructions for Mamiya RB67 ProS
https://docs.google.com/fileview?id=12CM_sA3yELlU4ek6n7e5QCF7yAZjnOOo4zicWgWWc0ewuMDfm-9P8zGGmjPV&hl=en&authkey=CIH7t-0M
Parts Catalog for Mamiya RB67 ProS
https://docs.google.com/fileview?id=1zH6tCMpny0AnZvulZzEkjiy1eHmDWBve0K70pH7CFWjvoLpem_sYmOaRTDw0&hl=en&authkey=CLaQ9eoC
Friday, July 30, 2010


Tuesday, July 20, 2010
Shoulder Mount Follow Focus Idea
After seeing the excellent work done here - http://athan.se/diy-shoulder-rig/
I (obviously) thought that inexpensive plastic gears with a gear ring would make it a litle more 'proper' (or even lego gears), but the major problem was still the twist of the wrist while holding a shoulder mounted camera, which is not ideal.
No matter which way your hands are position with bars that are more horizontal, or vertical, the concept has the same problem (though its a very excellent solution for a mobile camera and pulling your own focus).
It suddenly hit me - a trigger.
You could use a trigger (like a gun), instead of any twisting motion.
The trigger pulls a spring when you press it in, which draws a line/cord/etc hooked up to pulley or other device, that converts that motion into rotating motion so you can run a gear, which then you gear up to the lens.
So as you press the trigger in, the focus moves closer (or further away), and as you let go, the spring pulls it back in the opposite direction.
So simple!
I'll have to find time to start building all this shit.
I (obviously) thought that inexpensive plastic gears with a gear ring would make it a litle more 'proper' (or even lego gears), but the major problem was still the twist of the wrist while holding a shoulder mounted camera, which is not ideal.
No matter which way your hands are position with bars that are more horizontal, or vertical, the concept has the same problem (though its a very excellent solution for a mobile camera and pulling your own focus).
It suddenly hit me - a trigger.
You could use a trigger (like a gun), instead of any twisting motion.
The trigger pulls a spring when you press it in, which draws a line/cord/etc hooked up to pulley or other device, that converts that motion into rotating motion so you can run a gear, which then you gear up to the lens.
So as you press the trigger in, the focus moves closer (or further away), and as you let go, the spring pulls it back in the opposite direction.
So simple!
I'll have to find time to start building all this shit.
Wednesday, July 14, 2010
Satay
Peanut Oil + Chilli Powder + Ground Corriander + Ground Cumin + Brown Sugar + Peanut Butter + Milk = Delicious.
Monday, July 12, 2010
Graduated | Bleach Live Action
So I graduated.
What to do now?
I'm toying with the idea of doing a live action Bleach fan film in the trailer format, I want to show what a anime/manga to film translation should be like, as I heard there is a Hollywood manga to film adaptation of Bleach on the table.
Also because, the music is so great, and it can be really strong at times, I wish Bleach was pushed up to a Seinen rating from the beginning rather than Shonen, it'd have so much more potential.
Anyway, whatever I do, I'd be staying true to the character and style of Bleach and not raping it, though some differences rather than a complete literal translation are always needed to be true to the feel of the original material, as they are not in the same context across media.
I'd definately however, be targetting mine as 'seinen' though, in the anime adaptation of the manga, there is a deeper, darker and sinnister feel that kind of comes through but not quite, I want to bring this feeling right out, along with all the good points of Bleach.

What to do now?
I'm toying with the idea of doing a live action Bleach fan film in the trailer format, I want to show what a anime/manga to film translation should be like, as I heard there is a Hollywood manga to film adaptation of Bleach on the table.
Also because, the music is so great, and it can be really strong at times, I wish Bleach was pushed up to a Seinen rating from the beginning rather than Shonen, it'd have so much more potential.
Anyway, whatever I do, I'd be staying true to the character and style of Bleach and not raping it, though some differences rather than a complete literal translation are always needed to be true to the feel of the original material, as they are not in the same context across media.
I'd definately however, be targetting mine as 'seinen' though, in the anime adaptation of the manga, there is a deeper, darker and sinnister feel that kind of comes through but not quite, I want to bring this feeling right out, along with all the good points of Bleach.

Tuesday, June 29, 2010
DIY Light Meter Concept
So, just thought I'd make a new blog entry saying that I intend to build a light meter.
A CdS 'sensor' (light dependant resister or photo resistor) is pretty cheap, about $1, so I'm going to try and experiment and build a low-light meter.
Sekonic's seem to stop metering somewhere really lame, my Gossen Luna Pro SBC is several stops better, and goes down to EV -5, so I'd be looking at improving upon that essentially, a number of more stops.
Would be handy.
A CdS 'sensor' (light dependant resister or photo resistor) is pretty cheap, about $1, so I'm going to try and experiment and build a low-light meter.
Sekonic's seem to stop metering somewhere really lame, my Gossen Luna Pro SBC is several stops better, and goes down to EV -5, so I'd be looking at improving upon that essentially, a number of more stops.
Would be handy.
Sunday, June 13, 2010
16mm Motion Picture Film Developing Tank Mk1 aka "Missile Launcher"
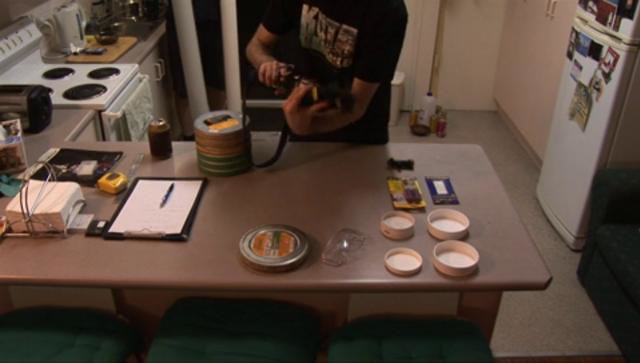
Okay so the first developing tank is completed, it has numerous problems in operation, though isnt expensive to make, is a pain in the arse to actually use, I have already learned a lot and have a number of refinements for the heliacal-spiral type, though I'm 'putting my money' on a simple 2D spiral type.
Ultimately I want to construct something that has semi-automatic loading of up to 1000 ft in lengths in both 16mm and 35mm formats, which I have a few ideas for the future for.
Anyway, I've posted a video on vimeo detailing on putting this first version together, I will post chemistry mixing for ECN-2 and other videos in the future, such as other tank versions, and actually processing ECN-2 film, and B&W motion picture reversal stock.
http://vimeo.com/12522602
Video journal of the "missile launcher" (since it likes to launch the inner tube like a missile if you dont tape the end cap on when using it).
This shows construction of the first 16mm ~100ft I built (ended up being 86.5ft in this one).
There are problems with this design I didn't know about or think of until I went to use it.
This design takes a long time to construct, is very difficult to load.
I would also recommend if using the heliacal-spiral type like this desig of mine, to have the spiral track cut into a tube (perhaps a wooden solid cylinder?) about 0.5cm+ deep so the film can be crank-wound on.
Currently, at the moment I recommend a 2D spiral type on a base board that gets placed into a bath, a spiral may seem hard to make, but you can do it with vertical rods (nails, dowel, otherwise, etc) rather than two tracks at bottom and top like a 35mm/120 roll hand processing tank for still film.
If your film needs to touch against something (such as the rod 2D spiral type or rack processor, or this tank in the video) wind it on so the emulsion side is not touching anything, then it is perfectly fine.
I'll make a new tank and show a video, as well as mixing up useable formula for processing ECN-2 at some point.
I'll be scaling up my final design when I find the perfect design after building enough 100ft tanks for 400ft and 1000ft and 35mm as well.
Thursday, May 27, 2010
Adobe Premiere Pro 5 Desktop GPU Acceleration
GPU/CUDA acceleration can be enabled on nVidia cards that support CUDA and have at least 768MB of display memory apparently.
I did the follow hack with my GTX 260 (896MB) and it seems to accept it, I haven't done any serious testing or usage with it yet however.
How-To
(Source: http://www.cinema5d.com/viewtopic.php?f=29&t=14382)
[QUOTE=ZorkiKat;1002161]
A colour negative with punchy dyes will print with more punch on a positive material, when optically printed, that is.[/QUOTE]
Your results definately have a certain punch to them.
Step 1. Go to the Premiere CS5 installation folder.
Step 2. Find the file "GPUSniffer.exe" and run it in a command prompt (cmd.exe). You should see something like that:
-------------------------------------------------------------------------------- ---------------------------------------------------
Device: 00000000001D4208 has video RAM(MB): 896
Device: 00000000001D4208 has video RAM(MB): 896
Vendor string: NVIDIA Corporation
Renderer string: GeForce GTX 295/PCI/SSE2
Version string: 3.0.0
OpenGL version as determined by Extensionator...
OpenGL Version 2.0
Supports shaders!
Supports BGRA -> BGRA Shader
Supports VUYA Shader -> BGRA
Supports UYVY/YUYV ->BGRA Shader
Supports YUV 4:2:0 -> BGRA Shader
Testing for CUDA support...
Found 2 devices supporting CUDA.
CUDA Device # 0 properties -
CUDA device details:
Name: GeForce GTX 295 Compute capability: 1.3
Total Video Memory: 877MB
CUDA Device # 1 properties -
CUDA device details:
Name: GeForce GTX 295 Compute capability: 1.3
Total Video Memory: 877MB
CUDA Device # 0 not choosen because it did not match the named list of cards
Completed shader test!
Internal return value: 7
-------------------------------------------------------------------------------- -------------------------------------------------------
If you look at the last line it says the CUDA device is not chosen because it's not in the named list of card. That's fine. Let's add it.
Step 3. Find the file: "cuda_supported_cards.txt" and edit it and add your card (take the name from the line: CUDA device details: Name: GeForce GTX 295 Compute capability: 1.3
So in my case the name to add is: GeForce GTX 295
Step 4. Save that file and we're almost ready.
Step 5. Go to your Nvidia Drivercontrol panel (im using the latest 197.45) under "Manage 3D Settings", Click "Add" and browse to your Premiere CS5 install directory and select the executable file: "Adobe Premiere Pro.exe" (After adding mine said it was CS3 for some reason, no problem).
Step 6. In the field "multi-display/mixed-GPU acceleration" switch from "multiple display performance mode" to "compatibilty performance mode"
Step 7. That's it. Boot Premiere and go to your project setting / general and activate CUDA
I did the follow hack with my GTX 260 (896MB) and it seems to accept it, I haven't done any serious testing or usage with it yet however.
How-To
(Source: http://www.cinema5d.com/viewtopic.php?f=29&t=14382)
[QUOTE=ZorkiKat;1002161]
A colour negative with punchy dyes will print with more punch on a positive material, when optically printed, that is.[/QUOTE]
Your results definately have a certain punch to them.
Step 1. Go to the Premiere CS5 installation folder.
Step 2. Find the file "GPUSniffer.exe" and run it in a command prompt (cmd.exe). You should see something like that:
-------------------------------------------------------------------------------- ---------------------------------------------------
Device: 00000000001D4208 has video RAM(MB): 896
Device: 00000000001D4208 has video RAM(MB): 896
Vendor string: NVIDIA Corporation
Renderer string: GeForce GTX 295/PCI/SSE2
Version string: 3.0.0
OpenGL version as determined by Extensionator...
OpenGL Version 2.0
Supports shaders!
Supports BGRA -> BGRA Shader
Supports VUYA Shader -> BGRA
Supports UYVY/YUYV ->BGRA Shader
Supports YUV 4:2:0 -> BGRA Shader
Testing for CUDA support...
Found 2 devices supporting CUDA.
CUDA Device # 0 properties -
CUDA device details:
Name: GeForce GTX 295 Compute capability: 1.3
Total Video Memory: 877MB
CUDA Device # 1 properties -
CUDA device details:
Name: GeForce GTX 295 Compute capability: 1.3
Total Video Memory: 877MB
CUDA Device # 0 not choosen because it did not match the named list of cards
Completed shader test!
Internal return value: 7
-------------------------------------------------------------------------------- -------------------------------------------------------
If you look at the last line it says the CUDA device is not chosen because it's not in the named list of card. That's fine. Let's add it.
Step 3. Find the file: "cuda_supported_cards.txt" and edit it and add your card (take the name from the line: CUDA device details: Name: GeForce GTX 295 Compute capability: 1.3
So in my case the name to add is: GeForce GTX 295
Step 4. Save that file and we're almost ready.
Step 5. Go to your Nvidia Drivercontrol panel (im using the latest 197.45) under "Manage 3D Settings", Click "Add" and browse to your Premiere CS5 install directory and select the executable file: "Adobe Premiere Pro.exe" (After adding mine said it was CS3 for some reason, no problem).
Step 6. In the field "multi-display/mixed-GPU acceleration" switch from "multiple display performance mode" to "compatibilty performance mode"
Step 7. That's it. Boot Premiere and go to your project setting / general and activate CUDA
Subscribe to:
Posts (Atom)